Finish More Music
  • FMM Membership
  • Video Blog
  • Podcast
  • About
  • Login
  • FMM Membership
  • Video Blog
  • Podcast
  • About
  • Login
  •  
  • 0

Archives

FMM045 – When you say music is your life but you don’t act like it.

“Music is my passion!”

“I live for my music!”

“Music is what I want to do with my life and I will do whatever it takes!”

Sound like you?

If you’ve said all these things before but you take actions that simply do not back it up, then it’s time to take a step back and start being honest with yourself.

In this episode, I talk about one very powerful word that once you fully understand, will enable you to push forward and hit all of your goals…

INTEGRITY

Integrity is important in everything we do. When we have integrity, we are staying true to ourselves and we end up motoring towards our goals and living our life the way we want to.

If you lack integrity, you’re always going to be feeling like there’s something missing and you’re going to be frustrated and uncomfortable with your life.

Integrity can be the key to your success, so check out what I have to say in this podcast and start to make changes in your approach to securing your life dreams.

Key Takeaways:

  • “If you are feeling emotional pain, restlessness, frustration, pressure, discomfort around your music, then you are living a life that is out of alignment with who you are and who you really want to be.”
  • “Integrity is all about living true to who you are and who you want to be”
  • You can’t expect the people around you to support you when they can sense that you are not in integrity.
  • Be honest with yourself and spot your “Yeah, but…” moments and address it head on.

Resources Mentioned

  • FMM032- No Discipline, No Success
  • Creative Strategies for Finishing More Music Ebook

Thank You for listening!

I really appreciate you joining me and I hope you’re enjoying the topics and taking some real value into your music sessions.

If this episode resonated with you and you feel it will have a positive impact on the people you know, please share  it  by using the social media buttons you see at the bottom of this page.

To make sure you are always the first to know when a new episode lands: Subscribe here.

One of the things that helps people decide if a podcast is for them, is the review section. If you’re enjoying the episodes and feel they will add value for other music producers, please leave a 60 second review and rating. Thank you 🙂
  • 17 February, 2020
  • Podcast
  • More

FMM Live Q&A – Managing Super Sends

Each month inside of the FMM community we host a Live Q&A session where all our fantastic members can get together, chat and ask me any questions about music production and the music industry. We get some absolutely killer questions and answers so I thought, why not share this with my amazing YouTube community too? Well here we go! In this video, I explain how to set up ‘Super Sends’ and how to effectively manage them in your music. If you often find that your send and return effects get wildly out of control, this video is just for you.

Transcript

It’s my man, Gian. Hello mate, how are you? I have issues with using return tracks for effects specifically when going wild with super sings. It turns out to be too quiet or too loud like with the atmosphere thing with high feedbacks. Any tips on taming a wild beast? 

Right, so, I think there’s multiple questions going on in this and let’s break this down so we can answer things one by one. So number one, for anyone who’s not wondering and he doesn’t know what a super send is, let’s just dive over into Ableton. Sowhat would happen is one thing that you can do to kind of spice your tracks up is you go to a return and typically you load up like a bunch of cool effects. We could have the lazy near reverb, saturations but something that’s going to make a pretty kind of mad, big effect sound. Then whilst the track is running you literally, let’s imagine that we had like you know kick bass hats synth and all the rest of it, you’re going to pick some of your sounds and you’ll just quickly do a send throw. So you’re literally just throwing a very small slice of the audio from one of these tracks to your super sing so I can’t, I don’t know who came up with a name for it but basically a singer with a load of stuff on it. And what that does of course is you get a little slice of audio that then gets blasted through delays and reverbs and returns and all kinds of good stuff so if you are doing that and it’s getting out of control, first things first, if you’re automating this you might want to go back in and just make sure that you’re sending similar amounts to the return because obviously if I’m you know doing this on push or even worse like a mouse which I sometimes do and I’m bloody lazy and you might have some like full beans in your sending the entire 100% of your signal to your return track, and other times you I’ve only got like 60% and of course as a result the volumes coming out of it are gonna be wildly different. Now you want some variation in there I would say or it doesn’t sound very human but ultimately if you find that you’ve peaked it a few times and gone a bit crazy just get in and deal with the automation. So that’s the first thing you can do. The second thing you can do is go to the end of your super send and put a limiter on there or some really hard compression. And what that obviously is gonna do when you’re turning this up you when you push it harder, it’s gonna drive into the limiter which is then gonna start turning it down, but it will still sound different because a louder amount of volume will have gone into each of the effects so they’re all going to sound a bit different particularly if we’ve got saturation or other coloration on there which is gonna be driven hotter, all of a sudden we’ll be getting more harmonics and frequencies coming through, and plus the RMS the average volume is still going to be louder even though the limiter is taken down that the peaks of it you’re still gonna get a perceived increase in volume. So that is a nice way of still keeping a whole bunch of variation in there, whilst simultaneously allowing yourself that extra kind of expression. So they’re the first two parts. Now the third part that you’ve alluded to in here is something with high feedbacks in there. So this can be a case of if if you’ve got, and I’m gonna imagine that maybe you’re using a feedback loop which is where you would use something like a dub delay and you can literally be going in and again let me show you this. It might be a situation where what you’re doing is you’ve got your sends enabled and you’re sending the return back to itself. So picture the situation we’re sending a piece of that you know maybe it’s a I don’t know a six think let’s say we’ve quickly chucked in and chucked out like you would if you were DJing. You’ve sent that slice of audio to the return track, it goes through the return track picking up all of the effects and then you may be sending that back into itself so it comes back round the system and goes in creating a feedback loop. So this is quite a common thing to do if we’re creating builds and other interesting things, but as a result, you can often get a pretty nasty buildup of frequencies. So there’s a trick that works really nicely if you’re getting a frequency build-up and it’s starting to scream and resonate if you’re doing something like this, even if you were to put a limiter on there you’re still going to get this frequency build up. You’ll control the volume but you’ll still get this tone, this screaming, little bit like I was talking about in Brian’s track where there was one tone that was overriding the situation, that wasn’t for a feedback loop but it’s just that one resonance in the track. If you’ve got something like that going on then you can add some modulation and something like auto filter or any filter that will modulate if you’re not using Ableton for example and you can just have something like this going on that sweeping up and down the chain. And what this does is it stops there being a massive buildup of frequencies if you were using this kind of feedback loop, because the frequency has a chance to die down because it’s no longer feeding back through itself, and then we just keep moving so no one of the anyone feedback isn’t able to feedback on its cell phone on itself feeding through typically this is a problem if you’ve got a delay in there so that kind of forever delay trap that you can fall into which is it’s a beautiful atmospheric sound and I’m imagining that’s what you’re talking about when you’re creating a big kind of wash of atmosphere. That sort of really nice movement if you’re modulating that just by turning the LFO on in the filter or any filter with that capability which is most often because they’re designed to move that will stop a buildup of frequencies so that’s how you can control frequencies and how you can control wild kind of a unit out of control volumes as well when you’re using these kind of super sends and big atmospheres coming out or your returns. 

I’ve released a brand-new totally free ebook for you called Creative Strategies for finishing more music. It features some of the world’s top underground producers sharing their inside tips on how to be prolific, handle creative pressure, turn your inspiration in to finish tracks and give yourself that important edge in the music industry. Bieber has 15 pages rammed with insights and workflows from some of the world’s biggest underground music producers including John Double-O Fleming, Slow MeHaba, Claude Young Jr and Mark Jenkins and there’s loads more. The ebook is totally free for you so dive over to finishmoremusic.com/ebook and grab yourself a copy now.

Thank you for watching

I really appreciate you tuning in and I hope you’re enjoying the tutorials and taking some real value into your music sessions.

If this video resonated with you and you feel it will have a positive impact on the people you know,  please share  it  by using the social media buttons you see at the bottom of this page.

To make sure you are always the first to know when a new video lands: Subscribe to the FMM Youtube channel here.

Let me know how you get on with the techniques I showed in the videos and if you have any suggestions for future tutorials, ping me a message on Instagram (@IamKeithMills)

  • 14 February, 2020
  • Video
  • More

FMM044 – Scrimping on investing in yourself? You’re paying a steep price!

Have you ever gone out and bought something, thinking you were getting a great deal because it was cheap compared to other options that were available?

We’ve all done it….

Then, after just a few days / weeks, it turns out it wasn’t a good deal at all because it either broke or simply just didn’t do what you needed it to do….

So, now, you have to go back and pay again to get the more expensive, higher quality option. The one you should’ve bought in the first place!

Now you’ve paid for the cheap and the expensive version and lost a bunch of your time in the process…

More than often, investing in the higher quality, more expensive option should have been your first choice and would have prevented this fiasco in the first place!

So what option should you choose when investing in yourself, your music and all other areas of your life?

It’s exactly the same game! If you choose the cheap option, you immediately pay the price and more often than not, it’ will cost you a lot more than your initial investment.

In this episode, I discuss how you should always strive to invest in the highest quality additions to your life at the very start and how you can push yourself to afford it, no matter what!

Key Takeaways:

  • The real cost of being cheap
  • “Pay Cheap, Pay Twice”
  • Invest on who you want to become
  • “Act like someone who can because you will be able to”
  • “Time is your most valuable resource”

Resources Mentioned

  • Creative Strategies for Finishing More Music Ebook

Thank You for listening!

I really appreciate you joining me and I hope you’re enjoying the topics and taking some real value into your music sessions.

If this episode resonated with you and you feel it will have a positive impact on the people you know, please share  it  by using the social media buttons you see at the bottom of this page.

To make sure you are always the first to know when a new episode lands: Subscribe here.

One of the things that helps people decide if a podcast is for them, is the review section. If you’re enjoying the episodes and feel they will add value for other music producers, please leave a 60 second review and rating. Thank you 🙂
  • 10 February, 2020
  • Podcast
  • More

Roberto Masterclass – Why You Should “Finish Every Track You Start

Exclusively inside the FMM community we regularly host Masterclasses and Interviews with top pro’s in the industry. Recently we had the Techno legend Roberto host an interactive live class with our members. We opened up his DAW, examined 2 of his top tracks, and the community was able to ask him any questions on his mindset, workflow and other industry secrets. This week I’m giving you a sneak peek into this incredible Masterclass where Roberto explains to us the importance of finishing music and how that has helped him become the prolific Techno producer he is today.

Transcript

Basically I mix in stereo in Cubase and this is the particular plugin that I use. I’m not sure if I used it here [Music]. Yeah I did. So this is PSP 84, which is a delay unit. 

Is it the one that’s got reverb in it as well? 

I think so, yeah. 

Yeah it sounds awesome. I think I’ve got this one. 

[Music] that’s just bang in the middle, the ride, but what I find if I can like stretch it out using a wide stereo Widener, pulling it really wide it sits really nicely over the top [Music]. when I click that on it just pulls it out and a friend of mine, the drum bass guy, made this preset years ago using a delay. I’m not sure how he did it in here but it’s just the preset that I’ve got and it just makes everything super wide use stereo widening plugins different same thing basically but this I find sounds wicked when once you start putting it out wide especially like stuff in the high end. 

Uh-huh. 

You can’t really do it with low end because especially if you’re cutting vinyl records. As soon as you pull the bass out wide that is just a no-no when you’re cutting vinyl. So that everything in the low end must be as central as possible. Else, you just get an accolade basically. I’m not sure actually in Cubase there used to be a thing way on master you could just click a button and it would just put it all mono and then you could check how the mix is going compare to stereo and that’s, it’s probably a plug-in in here that does it now. That’s something that I should really be doing but I I don’t. 

But you’ve been getting away with it quite happily without it. 

Basically yeah. 

There you go I think that speaks volumes anyway..

But when I do the live when I do the live that is purely mono because it’s eight mono channels coming out of the MPC. 

Uh-huh. Okay, cool. Let’s go..

Liam Farnfield – do you work on a couple of tracks at once or one track and see it through until it’s finished. 

Almost every time I will start and finish a track. It’s quite rare I have multiple stuff going on. 

How many of on your spreadsheet now because that was, I mean we were you, I think it was like 458 or somewhat like that I don’t remember the exact number when we did the pro interview, and I’m pretty sure it was around that or 468. 

568 now. 

568 now, done another 100. 

Okay, Dovydas says what is your initial idea generation process. So we’ve already covered that. 

Just going back to that previous point Keith because I think this is really important. So I always start and finish my tracks and it’s not so relevant now but when I was really learning production, I set myself that rule and the reason for that is, and you might make a track which is crap, but if you finish the thing, you’ve still learnt something because you’ve done all the different parts to making a track. Now if you just start projects willy-nilly and never finish them, you could hit upon one eventually which is fucking awesome tune but because you’ve never finished the others, you’ve never arranged them, you’ve never mixed them, for you’ve hardly ever done it, you could quite easily kill the vibe of the track or just not fulfill its full potential whereas if you’re really good at doing the arrangements and the mixing in all this processing, when you do come to getting something really good on the go you can just run with it and get it done really quickly. And I learnt so much in the first few years by doing that. 

Words of wisdom. 

I’ve released a brand-new totally free ebook for you called creative strategies for finishing more music. It features some of the world’s top underground producers sharing their inside tips on how to be prolific, handle creative pressure, turn your inspiration into finished tracks and give yourself that important edge in the music industry. The e-book has 15 pages rammed with insights and workflows from some of the world’s biggest underground music producers including John Barlow Fleming, Slow MeHaba, Claude Young Jr. and Mark Jenkins and there’s loads more the ebook is totally free for you so dive over to finishmoremusic.com/ebook and grab yourself a copy now. 


Thank you for watching

I really appreciate you tuning in and I hope you’re enjoying the tutorials and taking some real value into your music sessions.

If this video resonated with you and you feel it will have a positive impact on the people you know,  please share  it  by using the social media buttons you see at the bottom of this page.

To make sure you are always the first to know when a new video lands: Subscribe to the FMM Youtube channel here.

Let me know how you get on with the techniques I showed in the videos and if you have any suggestions for future tutorials, ping me a message on Instagram (@IamKeithMills)

  • 7 February, 2020
  • Video
  • More

FMM043 – How to get out of your own way and achieve the success you crave

Maybe you’ve heard someone say this before: 

“That person is scared of success”

Sounds bonkers, right?

But what if reaching your version of success will expose you to the things that you’re not comfortable with and not yet ready to face?

So maybe that’s why they are deliberately avoiding doing things that will see them achieve their goals.. They are scared of success!

I never used to understand this mindset, but once the penny dropped I knew exactly what they meant!

I knew I had been guilty of this in the past and without even realising it, I was holding back my progress, rather than taking that next step and smashing through my goals.


In this episode, I’m going to be sharing with you some of the things I learned and the mindset I have used to knock down this barrier, so that I can help you charge forward towards reaching your goals in 2020

Key Takeaways:

  • “If the level of success you are aiming for is going to bring things into your life that you are uncomfortable or worried about, then your subconscious will push back and try to protect you from reaching that level of success. “
  • “Problem shared, is a problem halved”
  • Prepare yourself by surrounding yourself with people who has been there.
  • “Learn what the truth is and accept it!“

Resources Mentioned

  • Creative Strategies for Finishing More Music Ebook
  • Episode 30 – 30% More Energy For Your Music

Thank You for listening!

I really appreciate you joining me and I hope you’re enjoying the topics and taking some real value into your music sessions.

If this episode resonated with you and you feel it will have a positive impact on the people you know, please share  it  by using the social media buttons you see at the bottom of this page.

To make sure you are always the first to know when a new episode lands: Subscribe here.

One of the things that helps people decide if a podcast is for them, is the review section. If you’re enjoying the episodes and feel they will add value for other music producers, please leave a 60 second review and rating. Thank you 🙂
  • 3 February, 2020
  • Podcast
  • More

Distorted Delays

In last week’s tutorial I focussed on one of Ableton’s undervalued secret weapons – Overdrive. This little distortion effect has so much power and potential that I wanted to continue showing this off and create a little mini series of tutorials for you. This week we look at a really cool way to add distorted delays to a lead melody. This technique is super simple and can really help you to add some interesting character, movement and definition to your lead melodies and synth lines in your music.

Transcript

Okay so in the last tutorial, we looked at how powerful Ableton’s overdrive effect is and we looked at shaping err sounds so they either cut right through the mix or they sit better and gel with the other sounds in our track. Now if you haven’t watched that video I recommend going back now and making sure you check it out because I go through all of the parameters and how to quickly dial in the results you want with overdrive. So assuming you’ve already got that one under your belt, let’s dive into this tutorial where we’re gonna look at how to spice up a lead sound using a combination of overdrive and delays. So here’s our music example [Music]. And you can hear we got this wicked lead melody sound [Music] and we’re gonna be sending this to a return track. So let’s look at the setup on the return. Get yourself a spare return and load up overdrive and Ableton’s delay. So in the last tutorial, I showed how to dial in your settings so won’t go into detail on this but I’m going to point out a few things that I’ve done. First up we’ve got the pre-filter only working on the high mids and I’ve done exactly the same with the delay as well so it’s not delaying anything that’s happening in the low mids and the reason for that is often lots of delays in the low mids muddy up your track. So you’re gonna want to dial this in to taste but I wanted to focus on the high mid, get the crunchiness there and not interfere too much with the other sounds I’ve got going on elsewhere in the frequency spectrum. 

The delay itself very simple ping-pong to give us some width a bit of feedback on there 56%. Both of these effects are set to 100% wet so we’re only getting the effect signal. And then the big deal is of course how much drive and tone we want. So let’s have a listen to what happens if I ram the send all the way up. So this is maximum send. That might be easier in this view for you to see. Maximum send is now going to the overdrive [Music]. 

So you use the combination of the drive and tone to dial it in the sound that you want and the next step is just to turn down your return. Now I like to start with it about minus six so when I’m dialing in that Tambor using the drive and tone controls I don’t get any super loud volume spikes coming out of it. But what this now means is I’ve got a volume and a tone but I’m happy with it maximum send and then I can then throw this and mess about with it accordingly without ever ending up with something super loud that I don’t want going on in my track. 

And that’s it we’re now ready to play. Now I personally like to jam things in just to get a feel for where I want the delay to be happening and then I can always tidy up afterwards so it sounds something like this [Music]. 

I mean that getting some really nice tones and delays coming out, then you can of course go in and adjust it or if you’ve just got a feel for it like I have. You might want to draw stuff in so I got a feel that I kinda like this note, maybe not full. This one sounded pretty cool full blast. Definitely like what was going on the end here and so on and so forth and we could just experiment until we get the sort of tones that we want. So in context, here it is now with these extra delays [Music]. Very cool stuff! So there you have it. Another simple technique for this wicked little overdrive device. 

If you enjoyed the tutorial, you want more of the same then make sure you hit subscribe so you’re always kept in the loop and remember to grab yourself a copy of air completely free ebook 101 Ableton Tips for House and Techno producers. It’s got loads of resources in there, loads of tips, beautifully produced book. It’s got loads of links to videos for you as well. There’s a ton of cool stuff to get through finishmoremusic.com/101ebook so that’s 101 ebook. The link is of course also under the video for you. 

All the best take care until next time happy music making!

Thank you for watching

I really appreciate you tuning in and I hope you’re enjoying the tutorials and taking some real value into your music sessions.

If this video resonated with you and you feel it will have a positive impact on the people you know,  please share  it  by using the social media buttons you see at the bottom of this page.

To make sure you are always the first to know when a new video lands: Subscribe to the FMM Youtube channel here.

Let me know how you get on with the techniques I showed in the videos and if you have any suggestions for future tutorials, ping me a message on Instagram (@IamKeithMills)

  • 31 January, 2020
  • Video
  • More

FMM042 – Rejection. It’s Not You, It’s Them

Imagine investing your time and effort finishing and polishing a track, you’re really happy with the final result and feel great, so you decide to take the leap and send it out to a label. 

Only to receive a reply one week later…

“Sorry, not for us.”

Now you feel deflated, demotivated and question whether you’re good enough to make it as an artist….

The reality is rejection isn’t pleasant, nobody enjoys being rejected. However, with the right mindset we can choose to learn from rejection rather than taking it hard and letting it fuel negative emotions and self doubt.

In this episode, I’m going to share with you a positive perspective when it comes to dealing with rejection, to help you gain some clarity and confidence that can help you get over your fear of rejection and get your music out to the world.

Key Takeaways:

  • Quality VS Taste: “Just because your track gets rejected, it doesn’t mean it’s low quality. It’s just a matter of taste”
  • Have other people listen to your music and get a second opinion on the quality of your track.
  • Do your homework.
  • “It’s a numbers game and you’ve just got to find the right home for your music.”
  • “Nobody enjoys rejection, it’s how we deal with it that counts”

Resources Mentioned

  • Creative Strategies for Finishing More Music Ebook
  • Episode 30 – 30% More Energy For Your Music

Thank You for listening!

I really appreciate you joining me and I hope you’re enjoying the topics and taking some real value into your music sessions.

If this episode resonated with you and you feel it will have a positive impact on the people you know, please share  it  by using the social media buttons you see at the bottom of this page.

To make sure you are always the first to know when a new episode lands: Subscribe here.

One of the things that helps people decide if a podcast is for them, is the review section. If you’re enjoying the episodes and feel they will add value for other music producers, please leave a 60 second review and rating. Thank you 🙂
  • 27 January, 2020
  • Podcast
  • More

Drums That Cut Through The Mix

When it’s clear that one of your sounds doesn’t have enough character, doesn’t set the right tone, or just doesn’t seem to gel with the vibe of your track, it can often be tempting to go surfing looking for that ‘perfect replacement’. You may get lucky… but most likely you’ll lose hours to frustration, flicking through sounds that just do not work. The solution? In this tutorial I show you a secret weapon that quickly and easily allows you to shape and set the character of your sounds so they fit perfectly in your track.

Transcript

Okay, so I’m gonna kick this tutorial off with a question for you. How often do you listen to your tracks and feel that one or maybe more of the elements don’t really go together? So maybe you’ve got a sound there is a bit too wimpy for the track, or it’s sitting on top of the track, feels like it doesn’t bond with the other elements, or it’s not shining, or punching, or cutting through how you want it to. I’ll wager that happens quite a lot and of course it’s natural. In the kind of music that we make, we’re often grabbing sound samples since settings, all of these things from disparate wide variety of sources and then chucking them all together in one super sound. 

So what I’m gonna do in this tutorial is I’m gonna share a tool with you that you might be overlooking that will really help if you find this frustrating and it often comes up in your tracks. So before we get going, have a listen to the example [Music]

Okay the sound that I’m gonna be working on in this tutorial for you is the clap because it feels really weak to me. It’s not cutting through and importantly, it’s not driving the groove how I want. So again I’ll just play it very quickly and focus on the clap [Music]. Can you hear it really sort of lacks body and character and punch. So how are we gonna fix it? How we gonna resolve this? Well we’re going to be using the good old overdrive. I think this device probably gets overlooked because of its simplicity but in my opinion that is a big part of its power. So here we go let’s solo the clap and I’m gonna get rid of the reverb for now. I’ll leave the EQ kong’s, it’s just taking out low end frequencies that aren’t necessary. They’re competing with a kick in the bass so we don’t need them. So here’s a very quick overview of the overdrive. I’ve got it in a group with a utility purely so I can use the gain of the utility to level match. So it’s like adding an output gain to the overdrive and that means that when we compare with and without the processing, we can level out the volume we don’t have our ears fooled by a loud a signal that naturally sounds better. So first up, we’ve got the bandpass filter This cuts out frequencies or rather let’s frequencies through depending on how you look at it prior to it arriving with the distortion circuit, so only the frequencies you let through here will have the distortion applied to them. Drive how much distortion there is even at zero there is some distortion so don’t think that’s super super clean. And then tone acts like a high-pass filter. When it’s up at a hundred, all of the frequencies get through including a lot of the really sort of shrill often quite harsh top-end frequencies that can live in the upper mids and can make a sound unpleasant. Nothing wrong with that you might want that to help it cut through your mix or have that aggressive sound and as we turn it down, the sound will get progressively duller as higher frequencies are removed.Then you’ve got a dynamics control as we move towards zero compression is applied to the signal so particularly with drum sounds you’re going to hear them getting that little bit tighter, perhaps a bit punchier at higher settings they tend to sound a little bit more washed out which again can be great. It can help the sound to sit back in the mix a little bit more. The important thing to realize is there isn’t a right or wrong here you dial in these settings so that the sound sits how you want it to. And then finally we got the dry wet control, sorry. Obviously at wet its full effect at dry it’s no effect so this allows parallel processing. I’m going to leave it on a hundred percent so we can have a play around with this and you can hear what it’s doing. So first of all, here is a bandpass filter in action I’ll put a little bit of drive on just to turn the volume up and what I’m gonna be doing is locating the frequencies that I really want to boost and add the additional distortion to. So you can hear this is sort of quite thick murky. This isn’t going to help me. That’s much more the range that I like. We can be a little bit more precise with the q-value and you can tweak this around. I just get a rough ballpark figure at this stage. Once you’ve got everything playing you can make the final adjustment. Now we can hit this hard with a drive and listen to what’s happening particularly the top-end you’ll hear it becomes much more aggressive and we start getting sort of, I will say, hissing but that brittle upper mid and tops frequencies getting introduced. 

So I don’t want all of the really crunchy stuff at the top so I’m gonna dial it back and this is often how I set things. I pushed them too far so I can really hear what’s going on and then I dial them back to the setting that I want. Around 60, that’ll do and then just to have a feel of the dynamics listen as I bring this down to zero how the sound gets tighter and punchier. And the other way it will become more washed out and bit more sort of spacious I guess is the wrong word but you’ll hear it sort of flattens out it loses that punch and tightness, becomes more relaxed there’s a good word. I’ll leave it at 50 for now but you can hear this would be very useful for setting the groove because it effectively feels like it’s setting the note length to some degree and how much articulation we’ve got in the sound, right? And then of course we can dial back the dry/wet so let’s ever listen to it with the other elements playing at the moment and we’ll just play with the dry/wet, see how we get on. [Music] 

In fact super loud at the minute, so I’ll just take a little bit of gain off of that will level match in a second [Music]. So I kind of like it somewhere around the 50% mark but I could be honest. I kind of like it on a hundred percent as well. It feels that little bit tighter and more clinical to me that a little bit sort of sharper in the mix. So I think I’m just gonna leave it there and then we’ll level match and make some final tweaks. So we’ll take the entire rack off the volume is minus thirteen and a half as long as we get close we’ll be fine. Pretty much there let’s take one more DB off and then we’ll stick a reverb on and we can have a little listen. In fact, no we won’t we’ll adjust earth dynamics. But let’s get an idea of a before and after now [Music]. 

Really cuts through, right? So let’s have a little tweak on the dynamic, see if we can get this sitting even better [Music]. 20 or 30 works really well for me. We’ll get our reverb onto this one last actual level match [Music]. Still needs a touch taken off. There we go. So I’m gonna bring up a decay give it a little bit more splash and also whilst we’re at it where are we? Over here, oh let’s just dull back a little bit I think on this reverb. It’s a bit too much for me [Music]. And there you have it. So it still needs a bit of tweaking I’m not a hundred percent there with it yet but you can see how fast it is to completely transform a sound get it fitting much better in the mix more power and that final tweaking I’d always leave that right until the mix down. This is just something that I do on the fly to make sure things are feeling right and I’m excited to work on the track. So I’m gonna be doing it some more tutorials on using this killer little overdrive device and I’ll be exploring it with other sounds so make sure you stay tuned to the channel and of course if you enjoyed the tutorial and you want more of the same, do hit subscribe so you’re always kept in the loop and remember grab yourself a copy of our free a 101 ableton tips for house and techno producers. This ebook has got so many rave reviews so many cool messages people reaching out. So don’t miss out finishmoremusic.com/101ebook. Of course we’ve left the link for you under the video as well. Hope you enjoyed the tutorial until next time take care and happy music making!

Thank you for watching

I really appreciate you tuning in and I hope you’re enjoying the tutorials and taking some real value into your music sessions.

If this video resonated with you and you feel it will have a positive impact on the people you know,  please share  it  by using the social media buttons you see at the bottom of this page.

To make sure you are always the first to know when a new video lands: Subscribe to the FMM Youtube channel here.

Let me know how you get on with the techniques I showed in the videos and if you have any suggestions for future tutorials, ping me a message on Instagram (@IamKeithMills)

  • 24 January, 2020
  • Video
  • More

FMM041 – Silent Assassins That Hold You Back

I’m sure you have felt this before….

You’re sitting in your studio, trying to get your work done but for some reason you’re just not into it.

You’re distracted, you’re procrastinating, but you can’t really work out why….

It feels like there is a silent assassin that is sabotaging your focus, discipline, energy, commitment, and vitality in your music and your life. These feelings are so subtle that you’re not even sure it’s happening!

In this episode, I share with you how you can not only identify this silent assassin, but what you can do so that you are able to show up as the best version of yourself for the things you are most passionate about.

Key Takeaways:

  • “If you feel better, then you do better”
  • Body scan technique: Take a minute to check and assess yourself-mentally, physically, emotionally.
  • Check-in with yourself regularly
  • Assess your self-care routine
  • “Some people don’t do well because they don’t feel well” – Jim Rohn

Resources Mentioned

  • Creative Strategies for Finishing More Music Ebook
  • Episode 30 – 30% More Energy For Your Music

Thank You for listening!

I really appreciate you joining me and I hope you’re enjoying the topics and taking some real value into your music sessions.

If this episode resonated with you and you feel it will have a positive impact on the people you know, please share  it  by using the social media buttons you see at the bottom of this page.

To make sure you are always the first to know when a new episode lands: Subscribe here.

One of the things that helps people decide if a podcast is for them, is the review section. If you’re enjoying the episodes and feel they will add value for other music producers, please leave a 60 second review and rating. Thank you 🙂
  • 20 January, 2020
  • Podcast
  • More

The FMM Drone Rack

Drones have become synonymous with modern house and techno music. However creating them can seem like a time consuming, processing nightmare! With our new FMM Drone rack you can take almost any source material and turn it into a moving, evolving atmospheric drone in seconds. Plus with our pre-built macros you can drop the rack onto any channel, turn some knobs and instantly  create a range of drone sounds to use in your tracks. Check out this week’s tutorial and download your free Ableton Live 10 rack today.

Transcript

Okay so in this tutorial we’re going to look at a fast method for creating a huge variety of drone sounds. So these are absolutely perfect for setting the atmosphere vibe and tone in your music.  Now to make your life even easier, I’ve built yet a drone rack so this guy is going to help you to really quickly turn most sounds into an interesting variety of drones. Now it’s totally on me free to download so grab yourself a copy to use in your own projects. You’ll probably see a link on the video any second and certainly there’ll be one sitting underneath this tutorial. 

So let’s have a listen to our music example to get us started. We’ve got the beginnings of a techno track here [Music].  System nice little effects, nice shaker going on on the top but I want to add some drones to thicken this out. So I’m gonna start by making a base drone. This is the sound that I’m using and as you’re gonna see as we move forward, I’ve got a few different sounds  that I’ve turned into drones. But this is the base hit, so it’s already a nice sustained base but I want it to run for a bit longer because at the moment if I loop this up, you can see if I keep it in the time of the track I’ve only got a one bar loop, and if we play this over [Music], it’s pretty repetitive. So what I want to do is make this a bit longer and the easy solution here is just to warp this. So I’ll go ahead add a warp marker, and then I can drag this out so that I get a couple of bars worth of information. In fact, I’m gonna go just a little bit longer than this so I can set quite a handy loop in here. So let’s in fact let’s set that in here, it’s going to make my life a little bit easier so we go for two-zero-zero. Perfect so we’ve got a two bar loop now, and now it sounds like this [Music]. So you can hear it still sounds like it’s looping over but the rack is going to solve that for us. Now we could have gone even longer, drag this out even further, of course played around with our warp settings. You’re gonna get a variety of tones. Remember the longer you drag your sample out for the more artifacts sort of Phase II things and strange stuff will go on. Nothing wrong with that, just worth keeping it in mind. So now I’ve got a decent sample to work with from my drone rack. I’m just gonna drag this out fill up my loop space and let’s turn this on so you can hear it in action. So you can hear it smoothed over all those problems we had in the audio. As you can see I got a bunch of movement going on in here and then we’ve got eight macros for you. So the first two are fairly self-explanatory. The dry gain is literally gonna turn up and down the dry signal that’s coming through this rack and then the effect is delays and reverbs and things like that. So if I just blend the drone effect in you’ll hear it [Music]. So you can use these to balance, get your volume right, get the sense of space right in the sound, then low cut fairly self-explanatory and let’s just get rid of this a bit confusing. You got your low-cut in here [Music], so if you want fizzy layers or you want it less thick don’t want it interfering. For example with a base line that you’ve got in this is really handy, high-cut take out any fizziness if we want saint really dark sounding like this [Music]. It’s a nice menacing kind of sound. I’m gonna take a bit of that tops out I think it was a bit extreme, wasn’t it? Would go quite menacing with this sound then we’ve got this little pumping section here. So at the moment it sounds like you’ve got sidechain compression to your kick going on, but you can change the rate of that. This is a nice parameter to automate [Music]. So that worked really nicely for example in your breakdown, and then we can have help deeply pumping is IE how obvious it is and then this shape parameter is quite interesting as well [Music]. 

So these are some really really nice movement to the sound. Finally you got stereo width as you crank this up it just boosts the side of the signal so it feels like it’s coming around your head a bit more, and that is the rack. It’s super simple but very very effective on a whole range of sounds. We’ve spent a long time tweaking this one. Now you may have noticed the little max for live cymbals in here, we’ve actually made two versions of the rack – one that you can use if you’ve got max for live, and one when you click the download that is gonna come and will go for people who don’t have max for life where we’ve set up filters and things for you. So probably if you’re using suite 10 you’re gonna have em Pharrell in there already, but if you’re not using a suite version then don’t worry, we’ve got you covered as well it’s gonna work for you. But you do need live ten okay? So what else? Let’s turn this down, and I wanted to just show you it being used on a slightly stranger sound source. Here, I’ve dragged a hair dryer found sounding so this is just a recording of a hair dryer, and with this one I’ve taken quite a lot of the dry out so it’s more of a spacey sort of effect taken a lot of the lows out of this one as well and I’ve got it pumping quite heavily. So let’s have a listen to this sale [Music]. 

So some really really nice movement. Now, let me play you the track with these added in so you can hear what they’re bringing to the table [Music]. So some really nice thick atmospherics in there, and it’s super important to realize that you can chuck any sounds that they say could be synth sounds, stabs, anything you can think of, pots pans, it doesn’t matter. It gives you so many interesting textures once you warp the sound, drag it out so it’s got a decent loop length and then feed it into this rack. 

So as I said, this one is completely on me totally free just grab yourself a copy by clicking on the link underneath this video. Any sample is fair game and this one is a huge time-saver one extra tip for you, why not batch, record a bunch of these so that they’re ready to drop into the rack and create drones instantly when you’re making your music. Works a treat. Until next time take care. 

Thank you for watching

I really appreciate you tuning in and I hope you’re enjoying the tutorials and taking some real value into your music sessions.

If this video resonated with you and you feel it will have a positive impact on the people you know,  please share  it  by using the social media buttons you see at the bottom of this page.

To make sure you are always the first to know when a new video lands: Subscribe to the FMM Youtube channel here.

Let me know how you get on with the techniques I showed in the videos and if you have any suggestions for future tutorials, ping me a message on Instagram (@IamKeithMills)

  • 17 January, 2020
  • Video
  • More

Recent Posts

  • FMM 215 – Contribution Through Art Pt 4: Mentorship, Music & Changing Lives with Kedrick Jeffries 
  • FMM 214 – Contribution Through Art Pt 3: Creativity That Changes Lives: Empowering Youth Through Music w/ Mark Turk 
  • FMM 213 – Contribution Through Art Pt2: London Elektricity: Put Your Money Where Your Mouth Is 

Privacy Policy | Terms & Conditions | Contact Us
© Copyright © 2009-2025 Finish More Music. All Rights Reserved.

This website uses cookies to improve your experience. We'll assume you're ok with this, but you can opt-out if you wish.AcceptReject Read More
Privacy & Cookies Policy

Privacy Overview

This website uses cookies to improve your experience while you navigate through the website. Out of these, the cookies that are categorized as necessary are stored on your browser as they are essential for the working of basic functionalities of the website. We also use third-party cookies that help us analyze and understand how you use this website. These cookies will be stored in your browser only with your consent. You also have the option to opt-out of these cookies. But opting out of some of these cookies may affect your browsing experience.
Necessary
Always Enabled
Necessary cookies are absolutely essential for the website to function properly. This category only includes cookies that ensures basic functionalities and security features of the website. These cookies do not store any personal information.
Non-necessary
Any cookies that may not be particularly necessary for the website to function and is used specifically to collect user personal data via analytics, ads, other embedded contents are termed as non-necessary cookies. It is mandatory to procure user consent prior to running these cookies on your website.
SAVE & ACCEPT
Listen to the Latest Podcast Episode:
FMM 215 - Contribution Through Art Pt 4: Mentorship, Music & Changing Lives with Kedrick Jeffries
Your browser does not support the audio element.

$39

BUY NOW

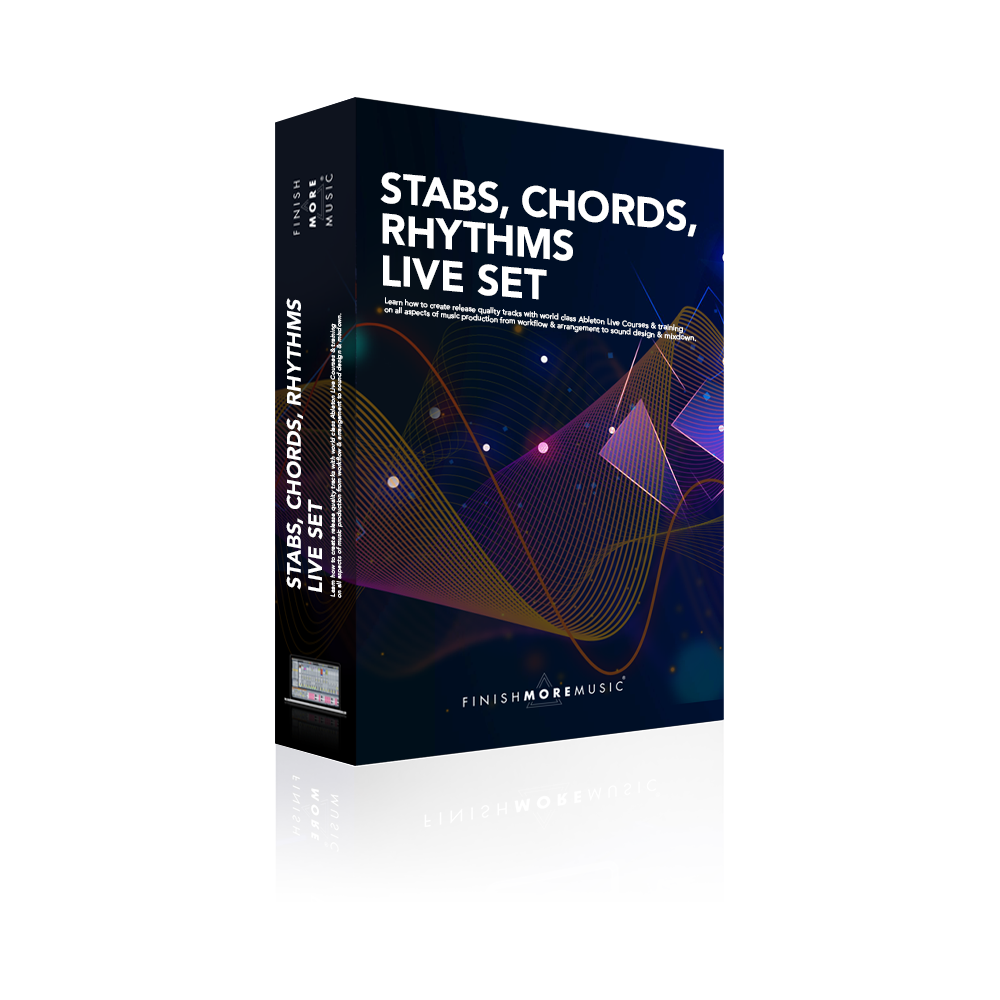
This Live Set contains unique racks and inspiring stab & chord rhythms that capture the pulse and atmosphere of underground dance music.

Generate an infinite number of new ideas to get you moving forward with your tracks by manipulating the sample, midi and effects chains contained in the Live set.

This pack is awesome for super fast harmonic inspiration and can really help kick start new ideas for your music.

Compatible with Ableton Live 9 and above

$39

BUY NOW

Do you often feel that the groove in your tracks doesn’t make you want to ‘bust a move’ as much as your favourite tunes? Well we’ve got this nailed for you…

In this Live Set, we’ve rammed in over 600 analogue processed samples backed up with a huge variety of midi groove patterns. Save yourself hours of flicking through your sample library and literally write 100’s of tracks without ever having to reach for another drum sample.

Compatible with Ableton Live 9 and above

$39

BUY NOW

Do you often feel like you’re banging your head against the wall trying to create interesting and credible melodies?

In this Ableton Live set we supply you all the tools and inspiration you need to create engaging electronic melodies that fit perfectly your music.

Whether you make the darkest techno, deepest house or floating, euphoric prog, this pack is for you.

Compatible with Ableton Live 9 and above

$39

BUY NOW

This Live Set contains analogue bass sounds and patterns that capture the pulse, depth and drive of underground dance music. If you like dark, driving styles such as Techno, Tech House, Progressive and Acid House, this pack will be fantastic for you.

We will show you how to manipulate our Ableton Live set and generate an infinite number of new ideas to get you moving forward with your tracks.

Compatible with Ableton Live 9 and above

$29

BUY NOW

Learn how to combine various chords to design your own captivating progressions for your music. Modulate the provided samples to add movement, depth and interest to the harmonic foundation of your tracks.

In this Live Set we give you all the tools to generate your own pads & chords, plus we show you how to deconstruct our pre-built Ableton racks so you can learn the insider tricks for designing your own.

Compatible with Ableton Live 9 and above

$39

BUY NOW

Do you often feel that creating dark, edgy melodies is an uphill struggle and you usually end up with cheesy happy sounding riffs?…

This Ableton Live set that will give you all the tools and inspiration you need to create riffs, melodies and arps that fit perfectly with underground dance music.

Whether you make the darkest techno, deepest house or floating, euphoric prog this pack is for you.

Compatible with Ableton Live 9 and above

$39

BUY NOW

Do you often struggle to add the final finishing touches to your tracks?

Do you find yourself wasting time searching through 100’s of cheesy effects and samples?

Waste no more time and take inspiration from this Ableton Live set that will give you all the tools  you need to quickly create unique SFX patterns and transitions for your music.

Whether you make the dark techno, minimal house or floating, euphoric prog this pack is for you

Compatible with Ableton Live 9 and above

$39

BUY NOW

Do you often get frustrated when the tracks you create evolve in a completely different direction and mood than you intended? Setting the right ambience and atmosphere at the very start will help you overcome this and support you in writing the style of music that you want to make.

We’re thrilled to bring you an Ableton Live set that will instantly set you up with the perfect mood and atmosphere for your music.

Compatible with Ableton Live 9 and above

$79

BUY NOW
  • Description
  • Video List

Description

Add a killer low end to your tracks with drive, groove and movement that works seamlessly with your other sounds.

Learn how to use multiple bass sounds and layers to create interesting and dynamic bass lines that are full of life and movement.

Lessons taught in Ableton Live 9

Video List

Total hours: 3.5h

  • Taking The Most From This Course
  • Inconsistent Bass
  • Minimal Offbeat
  • Kick & Bass Tuning
  • Offbeat Prog Variations
  • Syncopated Deep Tech
  • Compressors & Groove
  • Accents & Pulse
  • Rolling Basslines
  • Pumping & Breathing
  • Glide Bass
  • Harmonics & Modulation
  • Groove Emphasis & Colour
  • Octave Movement
  • Pulsing Mod Bass
  • Melodic Bass Tricks
  • Groove Tips and Tricks
  • Chord Following
  • Melodic House Bass
  • MultiBass QandA
  • MultiBass Cycles
  • Layered Bass Lines
  • Techno Rumble Bass
  • Atmospheric Layers
  • Rhythmic Layers
  • Filtered Bass
  • Audio Edits
  • Percussive Inspiration
  • Transcribing Pro Basslines 1
  • Transcribing Pro Basslines 2
  • Random Inspiration
  • Your Next Steps

$49

BUY NOW
  • Description
  • Video List

Description

Do you often listen to your tracks and feel they lack that ‘special something’ you hear in professional productions? Chances are you need to add movement, dynamics and variation to the sounds in your mix.

Using delays is the answer! We show you how to master this effect so you can level up your tracks and turn them into ‘something special’.

Lessons taught in Ableton Live 9

Video List

Total hours: 2.5h

  • How to approach this pack
  • Delay Lines
  • Feedback Loops
  • Multiple Delay Lines
  • Filters & Mono Sums
  • Dynamic Drums
  • Super Fast Percussion
  • Enhanced Movement
  • Cross Feeds
  • Frozen Delays
  • Advanced Vocal Delays
  • Melodic Accompaniments
  • Stereo Tricks
  • Stuttered Edits
  • Re-inventing Old Sounds
  • Melodic Offsets
  • Depth Delays
  • Multi-tap Delays
  • Effected MIDI Taps
  • The Hidden Multi-Tap
  • Modular Design
  • Mono Stereo Compatibility
  • Compression For Key Sounds
  • Top Mixdown Tips
  • Your next steps

$39

BUY NOW
  • Description
  • Video List

Description

Pads, drones and textures are vital for adding the movement and depth you hear in professional productions. They glue your sounds together and provide support for your leads and melodies.

This sound design master class shows you how to quickly create your own sounds and put them to use in your music.

Lessons taught in Ableton Live 9

Video List

Total hours: 2.5h

  • How to approach this pack
  • Perfect envelopes
  • Filter movement
  • Lush pads
  • Oscillator tricks
  • Huge pads
  • Spacious pads
  • Formant filters
  • Reverse engineering
  • Mastering FM
  • Complex FM pads
  • Algorithm tricks
  • Drones and textures
  • Vocal pads
  • Complex vocal pads
  • Bell pads
  • Granular textures
  • Ambience
  • Rhythmic ambience
  • Layering tricks
  • Arrangement tricks
  • Your next steps

$89

BUY NOW
  • Description
  • Video List

Description

Learn how to create music that connects with your listener’s emotions and touches their soul. Make music people will remember and understand the theory behind creating tracks that are dark and edgy, or uplifting and euphoric.

If you’ve struggled with music theory before, this is for you.

Lessons taught in Ableton Live 9

Video List

Total hours: 4.75h

  • How to approach this pack
  • Stab definition
  • Why learn about music theory?
  • Fast scales
  • Picking the best scale for your track.
  • Exploring intervals
  • Interval progressions
  • Exploring triads
  • Inversions
  • Deep 7th’s & 9th’s
  • Quartal chords
  • Borrowed chords
  • Chord progression tips
  • Classic house chords
  • Harmony – key concepts
  • Acid stabs
  • Rich analogue synth
  • Analogue synth processing
  • Vibrato movement
  • Prog stabs routing
  • Prog stabs design
  • Colouration, drive & vibe
  • Dub stabs
  • Dub delay
  • Timbre macros
  • Tech stabs
  • Compression & movement
  • Varied chords
  • Deep vintage stabs
  • Metallic stabs
  • Unique layers
  • Workflow
  • Your next steps

$69

BUY NOW
  • Description
  • Video List

Description

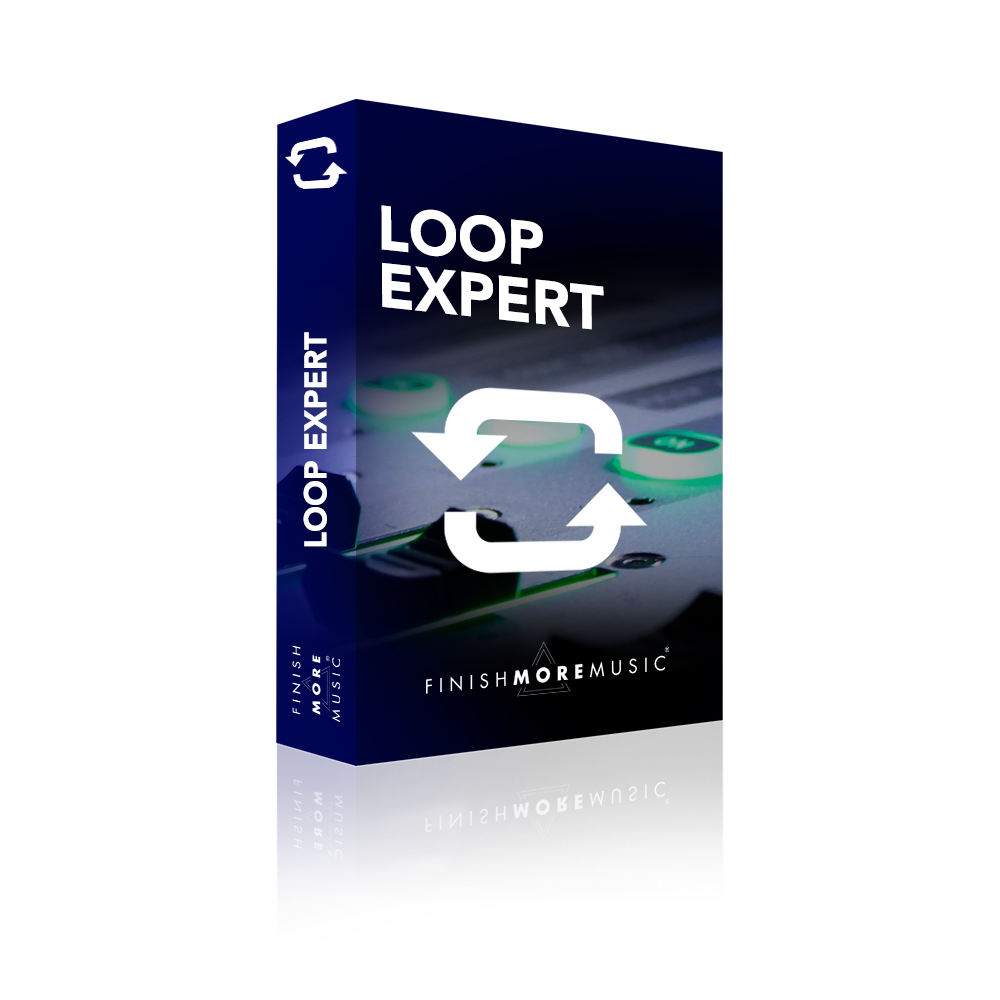
Using loops offers lots of benefits to your music. You can build a track quickly and easily, inspire new ideas, achieve a professional sound and gain access to playing styles and instruments that are not available in your studio.

We teach you how to make great music using your loop library.

Lessons taught in Ableton Live 9

Video List

Total hours: 3h

  • How to approach this pack
  • Re-arranging rhythms
  • Adding variations
  • Creating slice to MIDI presets
  • Fill variations
  • Ghost variations
  • Audio editing tricks
  • Effects washes
  • Oldskool sampling
  • Poly-rhythms
  • Organic timing
  • Analogue emulation
  • Layering for movement
  • Developing riffs
  • Developing riffs – advanced
  • Building tension
  • Building energy
  • Using chords
  • Developing chords
  • EQ separation
  • Phase separation
  • Stereo separation
  • Final loop
  • Superfast drum kit
  • Loop generator
  • Cheating, it’s to easy
  • Your next steps

$69

BUY NOW
  • Description
  • Video List

Description

For those who want to write melodies that are dark and edgy, or uplifting and euphoric. Understand how to add melodic tension & release in your arrangements to keep your audience hooked. Learn a unique approach to music theory aimed purely at dance music producers.

If your melodies always sound boring and uninspiring, this pack is perfect for you!

Lessons taught in Ableton Live 9

Video List

Total hours: 2.75h

  • Making the most of this pack.
  • What is a melody
  • Lightning Scales
  • Choosing the perfect scale
  • Dark Arps
  • Powerful rhythmic changes
  • Polyrhythms
  • Dynamic Life
  • Expression
  • Fast inspiration with software
  • Chord Progression Tips
  • Riffs, Ostinatos & Loops
  • Riff Core Structure
  • Tension & Release
  • Harmonic Tension
  • Chords & Melodies
  • Melodic Movement
  • Melodic Structures
  • How to Start and Finish.
  • Repetition & Contrast
  • Peak & Balance
  • Melodic Layering
  • Putting it all together

$39

BUY NOW
  • Description
  • Video List

Description

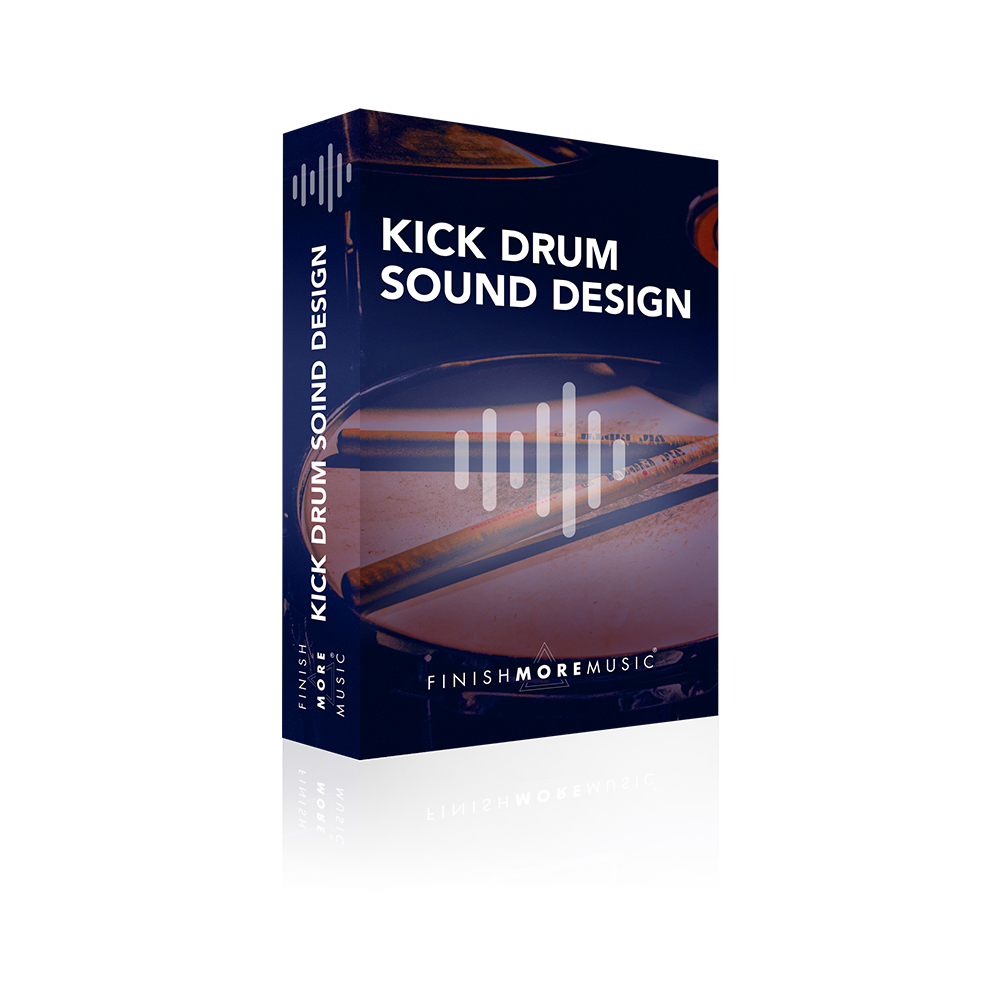
A powerful kick is a vital ingredient in electronic music to drive your track, enhance your bass and punch through your mix. Low end is king, but it’s also one of the most difficult things to master!

We teach you the ‘must know’ tips and tricks that simply aren’t available anywhere else.

Lessons taught in Ableton Live 9

Video List

Total hours: 2.5h

  • How to approach this pack
  • Anatomy of a kick
  • Kick synthesis
  • Using an oscilloscope
  • Advanced kick synthesis
  • Saturator
  • Crafting sample dynamics
  • Adding punch
  • Bite & Colour
  • Creative warping
  • Layering methods
  • Layering – waveform editing
  • Layering – EQ & atmosphere
  • Bouncing & creating an instrument
  • Pumping compression
  • Enhancing kicks with EQ
  • Tuning kick drums
  • Sampling kicks from other producers
  • Important workflow tips
  • Your next steps

$79

BUY NOW
  • Description
  • Video List

Description

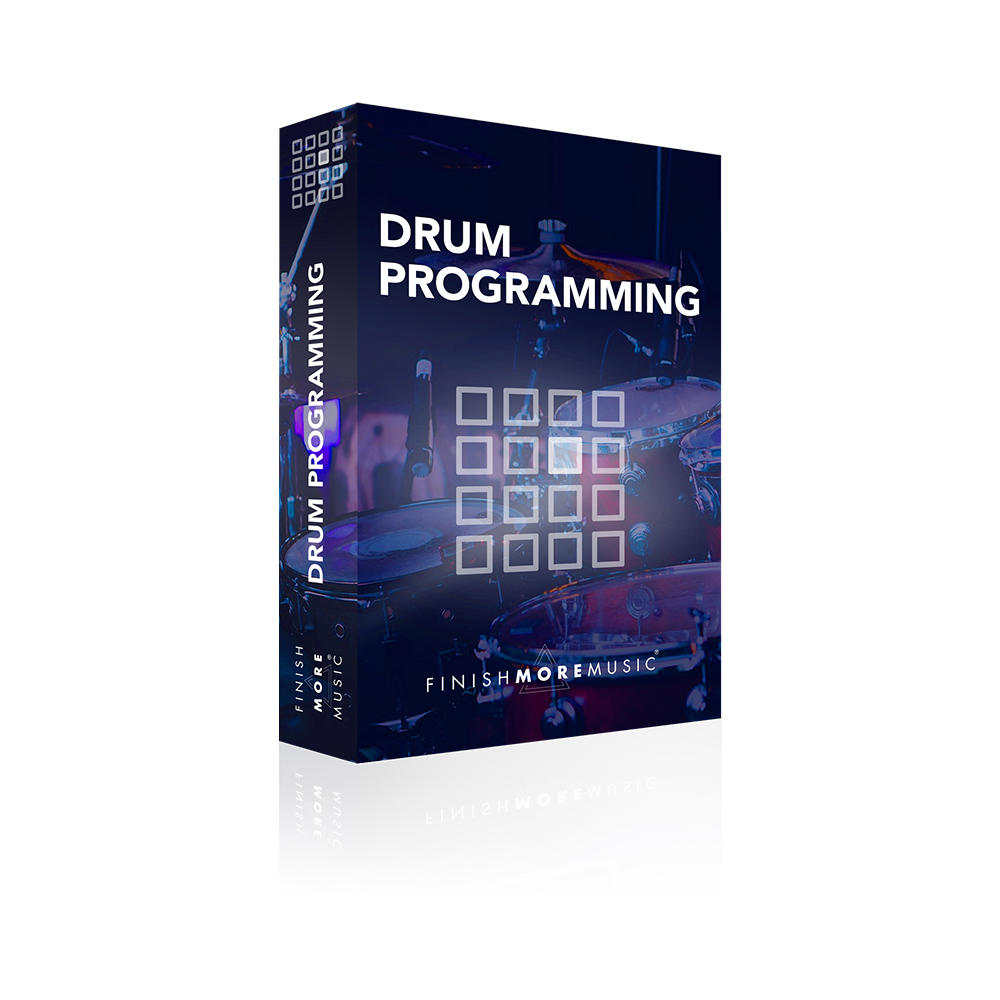
Create drum patterns full of life and variation for your latest musical masterpiece. Change energy levels to drive your music forward and seamlessly move between sections in your arrangement. Learn the insider tips and tricks that professionals use to enhance the groove in their music.

If you write music for the dance floor this pack is for you!

Lessons taught in Ableton Live 9

Video List

Total hours: 3.5h

  • Making the most of this pack
  • The rhythm framework
  • The power of accents
  • Rhythmic contour
  • Silence & contrast
  • Dynamics
  • Enhancing the groove
  • Analysing professional loops
  • Call & response programming
  • Adding life
  • House percussion analysis
  • Release & groove
  • Micro adjustments
  • Swing & groove uncovered
  • Deep & Tech hats
  • Super fast hat & perc patterns
  • Organic rhythms
  • Dusky house layer
  • Ghost notes
  • Rhythmic effects
  • Reverb settings for drums
  • Reverb tricks
  • Drum buss compression
  • Loop variation
  • Programming drum fills
  • Fast drum fill hacks
  • Snare roll tricks
  • Polyrhythms
  • Energy levels
  • Washy techno rides
  • Complimenting the bassline
  • Your next steps

<iframe src=”https://forms.monday.com/forms/embed/1fc1cf91f75c23a0b95ab5e7951c4f89?r=use1″ width=”650″ height=”500″ style=”border: 0; box-shadow: 5px 5px 56px 0px rgba(0,0,0,0.25);”></iframe>

Almost there: please complete this form and click the button to get access

Sign up below to get access to the
Finish More Music Workshop NOW

[activecampaign]

Privacy Policy: We hate SPAM and promise to keep your email address safe!

Almost there: please complete this form and click the button to get notified.

Sign up below to be the FIRST notified when the
Finish More Music Workshop begins

Privacy Policy: We hate SPAM and promise to keep your email address safe!